

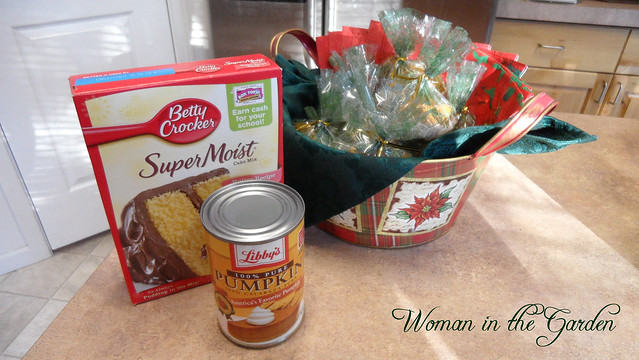
I recently found a pin on Pinterest for Pumpkin muffins with ~ get this ~ two ingredients! Really?? Two ingredients? And they actually taste good?? I was skeptical, but since it seemed so easy, I decided it would be worth a try. Here is the original recipe from "Sweet Verbena's" blog and here are the two ingredients. One cake mix, I chose butter yellow and one can of pumpkin. No liquids, no eggs. Easy, peasy!

A few pinners who had tried this recipe said that the pumpkin flavor was very subtle. Since I like pumpkin a lot, AND I can't do any thing as directed, I added three of my own ingredients. . . . . Just to make sure it really tasted like pumpkin bread!

1/2 cup Chopped Pecans (or other nuts you may enjoy); 1 tsp. Pumpkin Pie Spice; 1/2 tsp. Saigon Cinnamon. I just love the flavor and aroma of Saigon Cinnamon. It is heavenly. If you don't have Saigon Cinnamon, plain 'ole cinnamon is just fine!
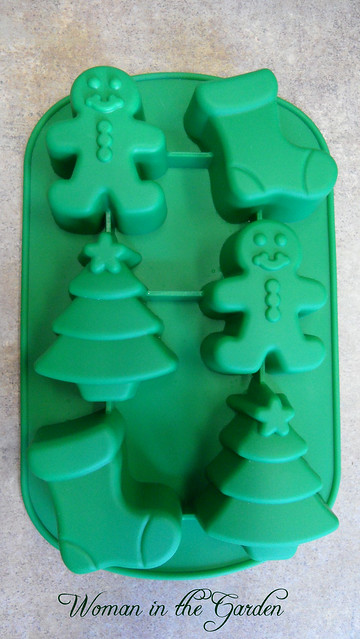
Mix the spices and the nuts in the cake mix before you add the canned pumpkin. Mix the ingredients well. The recipe says use a mixer, but my wooden spoon and a little elbow grease worked just fine. The batter will be thick. You will need to spoon it into your paper muffin cups. Instead of muffin cups, I used silicone baking molds. I love my Wilton baking molds! They are a great way to make an individual portion size without conforming to the usual cupcake. Here is the silicone mold I used.
Spray the mold with cooking spray before spooning in the batter. Only fill the cups about half full. Bake them at 350 degrees for 20-25 minutes. Let the treats cool for about 20 minutes before popping them out of the molds. Cool them completely on a wire rack. Once cool, they are ready to wrap up!
Step One: Grab your supplies - the cooled treats, Plain paper muffin cups and Treat Bags. I found nice holiday treat bags at Hobby Lobby on clearance last year.

Step Two: Flatten out the muffin cup and put your treat on it. Then wrap it up in the treat bag and cut off any excess bag at the top.

Your finished treats will look like this. Aren't they lovely?

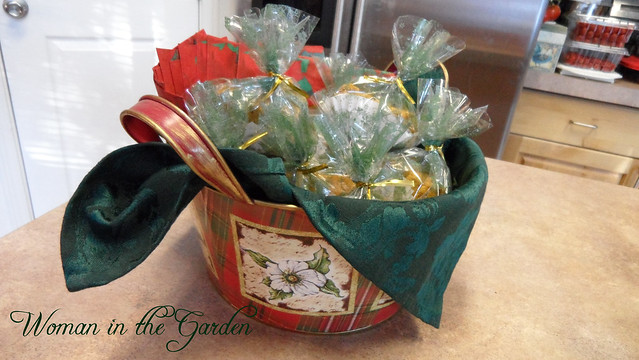
Once all your treats are wrapped, find something you love to put them in. I am partial to traditional Christmas red, green and gold. I had this pretty Christmas tin with handles. I used a damask fabric napkin to line the tin. You could also use any fabric or a tea towel that would coordinate with your container. Put your own creative twist on it!

Fill the container with your treats. Since my husband was taking this for a get-together, I also added some festive paper napkins. I fanned them along the back of the tin before I added the treats. It was functional but it also added an extra pretty flair! Here is how it looked when I was finished. Ta Da! A beautiful, homemade gift to give a neighbor, your child's teacher, a co-worker, or friend!

If you like making things but don't think you have time, try this! This recipe is super simple and best of all the results are delicious! The texture of the treats is more "cake" like than "bread" like. I made the treats in the evening and let them cool overnight. I wrapped them up and put them in the tin the morning my husband needed them. The whole process took about an hour, not counting the baking and cooling time. Most of my shopping trips take at least three hours!
Just a few ingredients from your pantry and some supplies from your craft stash will produce an awesome homemade gift! This is also a perfect project to do with your kids and it is a great way to begin teaching them the art of thoughtful, homemade gift giving.
I am all about handmade gifts. I love them because they say "I care enough to take my time to make something special just for you". The fact that it was quick and easy can be your little secret! Enjoy!


So cute! I love that you made them into fun Christmas shapes. What great gifts they will make!
ReplyDeleteWhat a cute and festive gift!! Perfect with a nice cup of tea too!! xxoo Heidi
ReplyDeleteThis is adorable! Even from a mix, I'd still probably have bad luck baking. I really want to try this though!
ReplyDeletethese look sooooo yummy.....luv the photos below too...hope you have a super weekend!
ReplyDeleteenjoy *~*
I think we should be friends! :)
ReplyDelete:) Absolutely!
DeleteWOW, this is gorgeous!!! As far as the ads, when you make different posts, the ads change...I think that they even change throughout the day, but usually, they are paired with what it is you are talking about on your blog. When I talk about art, they put ads that are about art schools. If I talk about home decor, they usually put an ad in that is about really beautiful stores that sell furniture. I hope that helps--It's really worth doing!!!
ReplyDeleteXO
Cindy
Thanks, Cindy! I appreciate the info on Google ads. Think I might just have to link up!
DeleteYour muffins sound sooo yummy...thanks for the recipe!!! I am going to give them a try this weekend!!!
ReplyDeleteWow, what a great recipe ~ I really have to try this out, thanks!
ReplyDelete♥Sharon